Happy Holidays!

I am still alive, recovering from my spinal surgery. I did manage to sew a few small things until I could barely move my shoulders. Not sure why, But I ended up getting multiple steroid shots in each shoulder. They are better now, not perfect but leaps and bounds better.

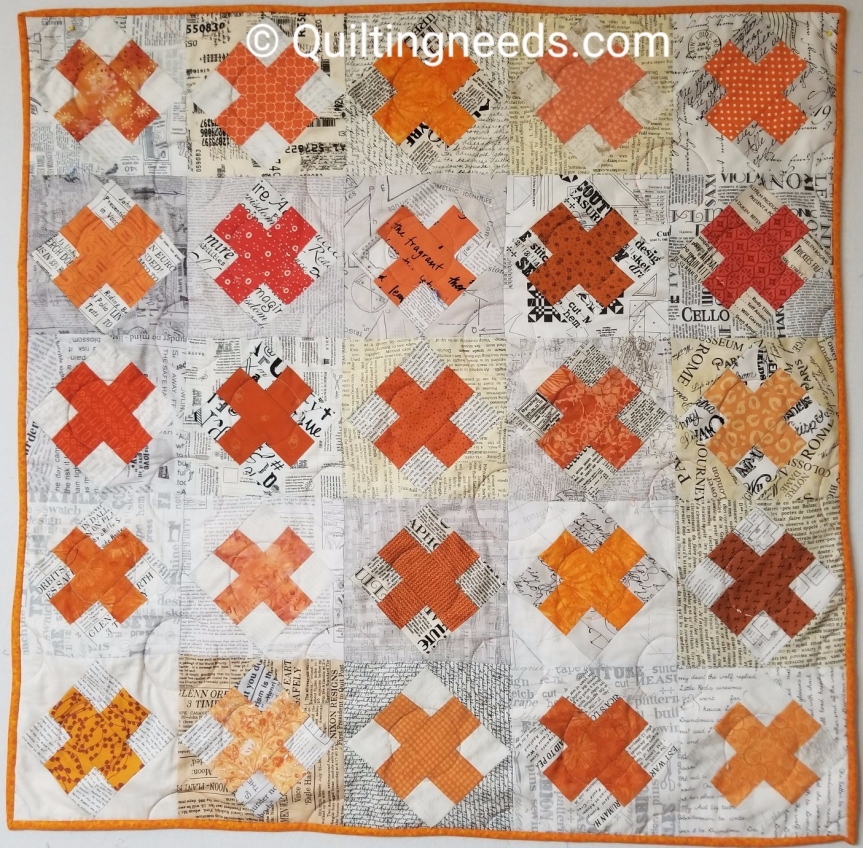
Gnomie GNomes – I did finish this, but neighbor Carol needed something holiday for her table, so she went home with it. I think she liked the back better than my gnomes. The back had snowman fabric on it. I failed to get a photo of it. Pretty sure I had it for like 20 years. Lol. She was happy and that is all that matters. It was a super easy pattern that went together quickly.

My daughter is home from college for the holidays. Makes me so happy. She has been baking and wrapping for me. My desire to do either is at an all-time low.

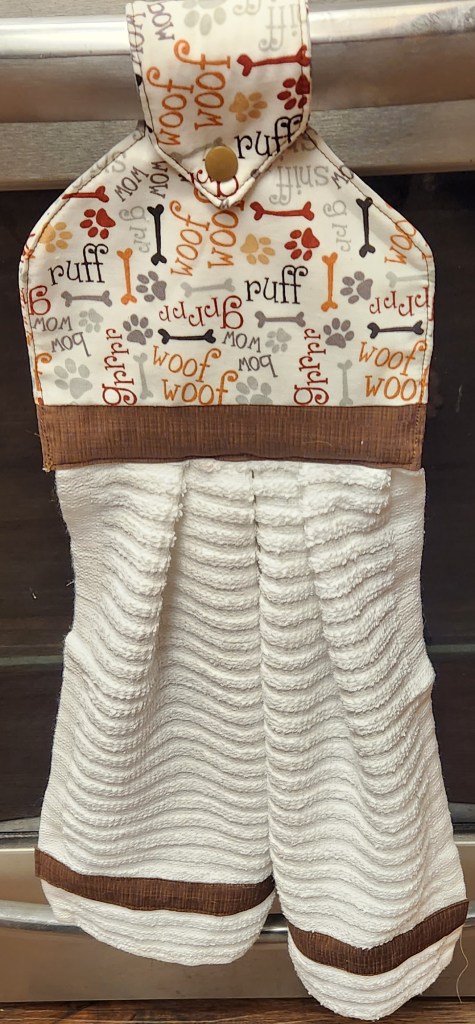
I made a few of these towels as gifts. I wanted to make more but only managed to do a few. Our guild does “Tiny Tutorials” and this was the one from October, I think. Basically used scraps of fabric and batting. I purchased bar mop towels from Amazon which were about $14/per dozen.

I have made a few other things, but not many. I failed to get photos. Not thinking like usual. I will get there. My surgery takes 1+ years to recover from, but I am of course hoping that time is shorter. I feel like I have not been myself for 2 years now. The positive is releasing the pressure on my spinal cord has resolved a few other issues I have had. I have quickly learned that your spinal cord controls everything, literally everything.

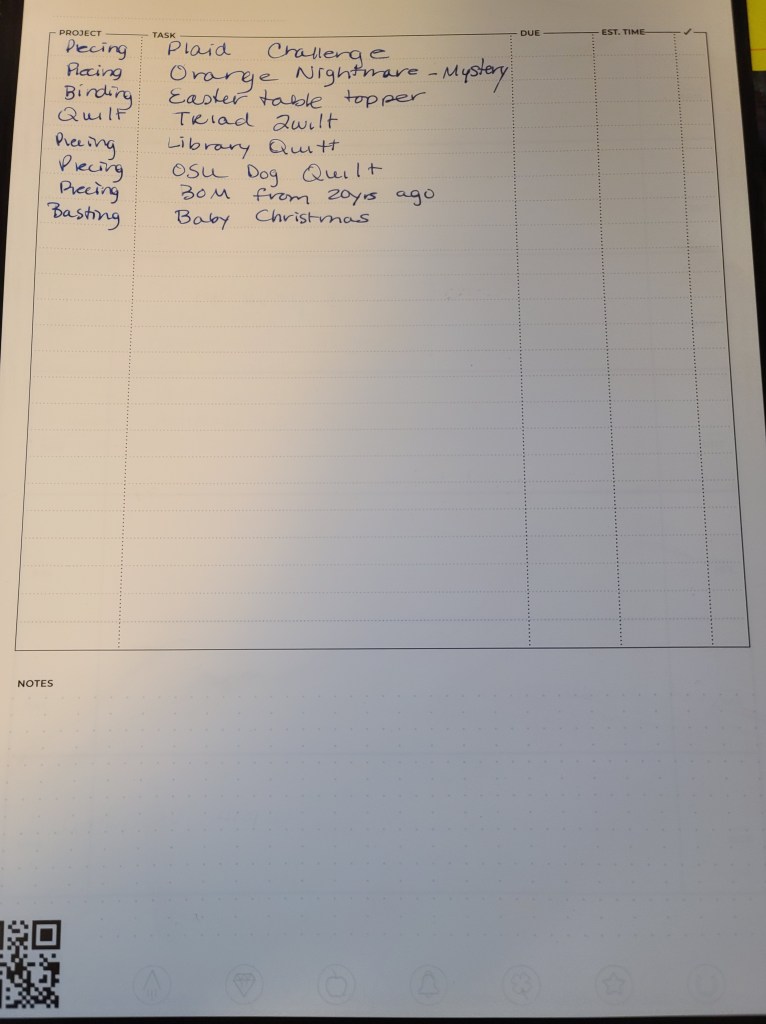
My plans are to get back in my sewing room quickly. I also have some organizational goals for 2023. My sewing area is a hot mess.

I hope everyone has a joyous holiday season.

Happy Sewing

Happy Quilting

I need no more hobbies…OK maybe one…

As if I have nothing else to do….Prime Day strikes and I feel the need to try Diamond painting. Why? It was prime Day. I only spent $3 (on this). My little sister Kellie always liked to do diamond painting. So, why not. In my mind, I could complete this, put some quilting around it and hang on the door for Valentine’s Day. Makes sense, right?

I know nothing about how this works. Looks pretty simple, but trying to figure out how these tiny things stick to the canvas….. I will figure it out or watch a youtube video.

I really did control myself on Prime Day. There were sewing items and Fabric.com deals. I had things in my cart a zillion times, but managed to come to my senses. Good thing because Connecting threads had a 20 fat quarter pack for $14 yesterday. I could not, in good conscience, let that go. I did not. Awaiting its arrival. Funny, I actually bought that same fat quarter pack for a project a while back for $45.

Hope all your projects are moving forward. I’ll let you know how the diamond painting goes…..

Happy Sewing

Happy Quilting

Happy Diamond Painting?

Not sure what to think

It seems that I can manage small pieces fairly well. Of course, still not good enough for me. I just want things to go back the way there were about a year ago.

So, this is the second able runner that I made from a scrap pack from my local quilt shop. I bought it for $12.99 and I think I have 2 more table runners from the same pack. I think it was actually a manufacturers sample. Some of them had pinked edges and they were all a pretty standard odd size. Regardless, I like it. It is a little busy looking, but tolerable, I think.

I do like this pattern it is called Jumping Jack. Very simple and easy. I will have to wait to quilt this until I open my black batting. Hopefully soon. I have a quilt I need to get ready for the long arm that requires black batting. Currently, I find using my long arm, very stressful. Since I can’t quite do things the way I want to I become frustrated and don’t want to do it at all. I know, wrong attitude.

I also made this one. I have hung on to a yard of this blue fabric for forever. For some reason I found it beautiful and did not want to use it. Finally did. It was super easy to do and great for using only two colors.

Gluten Sensitivity?

I am learning things every day. At some point I became sensitive to gluten (or so I thought). If I ate it, My heart rate increased to about 130+ for an hour or longer. This made me totally feel like crap. I was not overly thrilled with gluten free bread. It had a weird feel (gritty or something) in my mouth. So, I was unhappy. I constantly wondered why food would be taken from a fat girl. First you take my ability to do a whole lot of anything and then take food away form a fat girl? Come on. If things were not crappy enough. At first we thought it was sugar that was causing the problem. It would be much easier for me to avoid sugar. But no, it was everything I loved.

What I found out after some research was that it may not be gluten, but modern day wheat. So, I researched and found that many people with gluten sensitivity can eat heritage wheat. Heritage wheat? Wheat that was grown a long time ago. Not hybrid to yield more or sprayed with chemicals. I found a company that grows and mills this type of wheat. Sunrise Flour Mill makes just this wheat. I bought a bag. Super expensive $20 plus shipping for 5lbs. I made a loaf of bread and just like magic, I could eat it without the increased heart rate. It was like magic to me. I sat at the table eating bread, dipping it in olive oil in true fat girl style (I can laugh at myself). I have since ordered more and it gets less expensive if you buy bigger bags. his past Friday, we made pizza crust and our own homemade pizzas. It was delicious.

My mother was from Germany. These are one of our favorite things. We called them pretzel blobs, mostly because I think it annoyed my mother. They were (past tense) delicious.

Happy Sewing

Happy Quilting

Cool tool for Quilting, Wal-Mart, and other goodies

Wal-Mart

I know many many people hate Wal-Mart Fabric. Not always my favorite, but sometimes, I can’t help myself. This year’s Wal-Mart valentine Fabric was all Dog stuff. Being the crazy Dog lady, when I could by 47 yards of fabric of dog prints for under $20, I was not going to say NO. Even If I used this to make charity pillowcases, it could not be beat. And, it’s Dogs. Along with these 1 yard cuts I got about 50 fat quarters. I have a couple favorite dog rescues and hope to make something for them with all the cute doggie stuff.

Cool Tools – A RocketBook

So, at Christmas, I received a RocketBook. While I intitally got it for work, the first thing I did was use it for quilting…..

So, What is a Rocket Book? It is a reusable Notebook that allows you to save stuff to crazy places.

How it works: The Rocket Book uses erasable pens. You can write, draw and scribble and have them automatically save to wherever you designate. Sounds crazy, but the geeky nerd in me finds this little gem quite useful. The second photo shows where I am sending my pages to. You will notice that there is a QR code in the bottom left of each page. Once you download the rocket book app on your phone or tablet, you tell it where you want things sent. On the bottom of each page there are shapes that are tied to where you want your notes/drawings to go. Once you complete a page, you put an X through the picture (tells Rocket Book where to send) and use the app to snap a photo and it automagically goes there.

I have a Rocket Book Fusion – There are tons of different sizes with all different kind of pages. Project List, gridded paper, lined paper, calendar. Once you save your page, you wet your cloth (comes with it) and wipe off. It uses Frixion pens (comes with one), which many of us already have. I of course bought a pack of many colors (Wal-Mart has them, you can see my crazy quilt doodles)

Creative Notions Strikes again

This is my second subscription bag from Creative Notions. I really like this. It is $45.00 and I feel I really get my money’s worth. I love the panel and fat quarter pack that came in this month’s bag. I plan on making it for my front door. I better get moving, spring is right around the corner, hopefully. There is a pattern included (which I plan on using for the wall hanging). There is also a pattern to make a bag and all the straps/hardware are included. At my guild there are a couple of ladies that make the most beautiful bags, so I am anxious to try this. There are also two more patterns and a 45mm rotary blade and candy (always has some candy in there, which my daughter immediately claims). Just sharing something I think is cool. Looking forward to the next one. Happy Sewing, Happy Quilting

The “Unpaper” Towels

So, I completed my “unpaper” towels. I believe the actual pattern called them reusable paper towels, but I found hat an odd name since they were not paper.

Here is what I learned about making these:

Use a walking foot. I fought with it until I got the bright isdea to use my walking foot. After that everything went much better.

Put your opening to turn right side out on the side not where you want the snaps to go. It can make getting those plastic snaps more difficult if it is bunched and when you are closing up it is more likely that will happen (I sewed mine shut with the machine when I went around the whole towel.

I used three snaps on each end. The pattern called for 2. Initially I had such issues, that Iput three on each end. I will try 2 if/when I make these again.

The plastic snap tool – Watch a video on how to do it. I failed to do this and once I did, I had way more success. Use it on a hard surface (once I watched a video, I put a wooden cutting board under mine). Be prepared to waste some snaps until you get the hang of it. I did not buy my snap tool just for this, but also for baby bibs. They are not expensive maybe 20 dollars for tools and a whole box of colored snaps. I bought it on Amazon. It came with the the big box (top left). I bought some additional snaps because they were inexpensive.

The Practicality of “Unpaper” towels – Not sure on this one yet. I will have to review the actual use by everyone at our house. I am hoping to hear less harsh words over lack of dish towels and having them all over the counter. I made a roll of ten and then some spares (I think I had 8 more). Once it has been in use a while at my house I will let you know if it is a truly useful item. So far, it makes me happy to use up the stack of older towels we had.

I am feeling better every day. Looking forward to losing this neck brace. I am back to work, which is great. I am not good at sitting around doing nothing. Prior to my surgery, I got a new super expensive office chair (X-Chair). It has a neck rest and heat/massage. It has been a life saver and allowed me to return to work quickly. I did not want to sped the money, but Kevin made me……good call on his part.

Happy Sewing

Happy Quilting

And… I am back

Successful Neck Fusion.  I am already getting the feeling back in my arms and legs.  I was told it might take a while for my spinal cord to recover, but I already see an improvement.  I did spend one night in the hospital, which was the right thing, despite the fat that I did not want to.  But the first night was a bit rough.  Glad it is over. and I can get back to my life.

So, yes, I have already been sewing.  Not the easiest thing to do with my star wars brace, but it is my happy place.  Not a lot, but every little bit counts. Reusable Paper Towels –   Sounds weird, but at my house, dish towels are used every day multiple per day.  It is hard to have enough and have a place to store them.  Then there is the fact that I am a freak also.  We have 3 dogs so if the towel gets dropped on the floor I am done with it , and in the laundry it goes.  Also, if I don’t know where the towel has been and it is out on the counter, in the laundry it goes.  The five second rule does not apply to dish towels at my house. I am using the JoAnn Fabrics dimensions. I had the flannel and am using some old towels that were in really good shape. I looked at buying yardage of terry cloth, but it was expensive and I did not like the feel of most. Easier to buy Bath towels, or use what I had.

So, I am done with the quilting on the Easter Topper. I tried to get fancy, but am still somewhat limited. I need more practice. So, before my surgery I attempted to make bias binding for this piece. Epic fail. I don’t make bias binding often and had to look up how to do it. Still did it wrong and wasted some fabric. I was not clear of mind right before the surgery, so I should not have attempted. Lesson learned. Hoping I have enough of something that matches to give it another go.

This is my contraption that I must wear. Super Attractive. Basically keeps me from moving my neck. I get to take it off for sleep, which I am quite happy about. It does look like something from Star Wars and I am still trying to come up with a witty name for it. The worst part about this surgery was the wait time before. You are left with your own thoughts, which are far worse than ay surgery could be. I have so many sewing things planned, I am hoping I can get to work on all of them soon.

Happy Sewing!

Happy Quilting!

Check out my new thread rack…sort of

So I bought myslef a new thread rack that I love.  Except, it is not really a thread rack, it is for nail polish.  However, i love it for threads and  it even fits serger thread.  Plus it looks so pretty.  It is from Amazon  If you are interested.  Finally I can see all my thread and not rifle through boxes and drawers.  I actually have more thread and my serger thread, so I may get another one.

So, an update on my basting spray issue. THank you to Sharon for reminding me to email the manufacturing company.  This is what they told me:

Good afternoon Lori,
     Thank you for reaching out to us at June Tailor. We did have to make some changes to the basting spray due to a new law change in California. You will be happy to hear though that we have since revised and it is now like the original basting spray yet staying within the guidelines of the new law. It is due in here to us sometime in August. If you would like to send me your address I would like to send you a can on us, to try. Below is the changes we made and why.
Thank you for reaching out.  I have included an overview of some of the changes made to the formula and why.  To summarize, we needed to make changes to our formula to comply with regulations in the state of California.  We also moved our production to the United States and already have our chemists working on improvements for our second production run.  In addition to a more robust nozzle with a more restrictive flow rate, we have worked on the scent.
Our Quilt Basting Spray is made up of an adhesive and a propellant. A propellant is a compressed gas that acts as a vehicle for discharging the contents of an aerosol containers; in this case, the adhesive component.  The state of California now restricts us on using certain types of chemicals in this propellant, so we have had to modify our formula slightly. The adhesive should work basically the same as previous cans.
We added the ball in the can to further assist with mixing of the adhesive and the propellant. Please be sure to shake the can well before using.
If your can has a small white spray nozzle with a black dot, you may need less of a heavy hand when spraying your batting. We have already made modifications to the design and flow-rate of the can nozzles on the cans to provide a more restrictive flow as the product is sprayed. This should help with stickiness and dry-time.  It is, of course, still always best to test a small piece of fabric and batting.
Additional modifications are already being implemented in regards to the odor and we are looking for additional input from you, our long-term customers. We have received excellent customer feedback and questions about the changes to the product and are working very diligently with our chemists to make product improvements and adjustments to give you the very best experience with our basting spray while keeping within regulatory guidelines.

I can hope there is improvement. It was my favorite basting spray.  I actually have a couple of quilts finished.  Need to get those posted.

Happy Sewing

Happy Quilting

Spray Basting with very little space

I have heard many people say that basting, especially spray basting takes a lot of space.  I may have a solution.  I managed to spray baste my star wars quilt in a small amount of space that would equal a kitchen counter.

WARNING….You will see my very messy sewing space.

So, my quilting friend Lynn, taught me this trick.

You buy Pipe wrap (for insulating your water pipes).  It is cheap,  about three dollars for 4 pieces that are about 4 ft each.  I bought a total of 8.  Then you buy 2- 8ft. PVC pieces and have them cut in half (The nie people at lowe’s or Home Depot will do this for you if you don’t have anyone at home or can’t transport 8ft long PVC pipe).  They are about three dollars each.  I use the PVC pipe to put two pieces of the pipe insulation together and add stability.

1.) Cover your surface-especially if you are using your counters.  I buy vinyl tablecloths watermark_2019-01-15-13-33-49watermark_2019-01-15-19-51-30(especially after a holiday they are super cheap).

2.) take 2 pieces of pipe wrap and place a piece of the PVC between them.

3.) Evenly pin your backing to the pipe insulation.  Use as many pins as you feel you need.  Roll up your backing, keeping it smooth.

4.)  Then, do the same with your batting.  Smooth out as you go.

5.) Next, we begin spraying the batting to the backing.  LIne them up and spray a couple watermark_2019-01-15-19-52-08.jpg
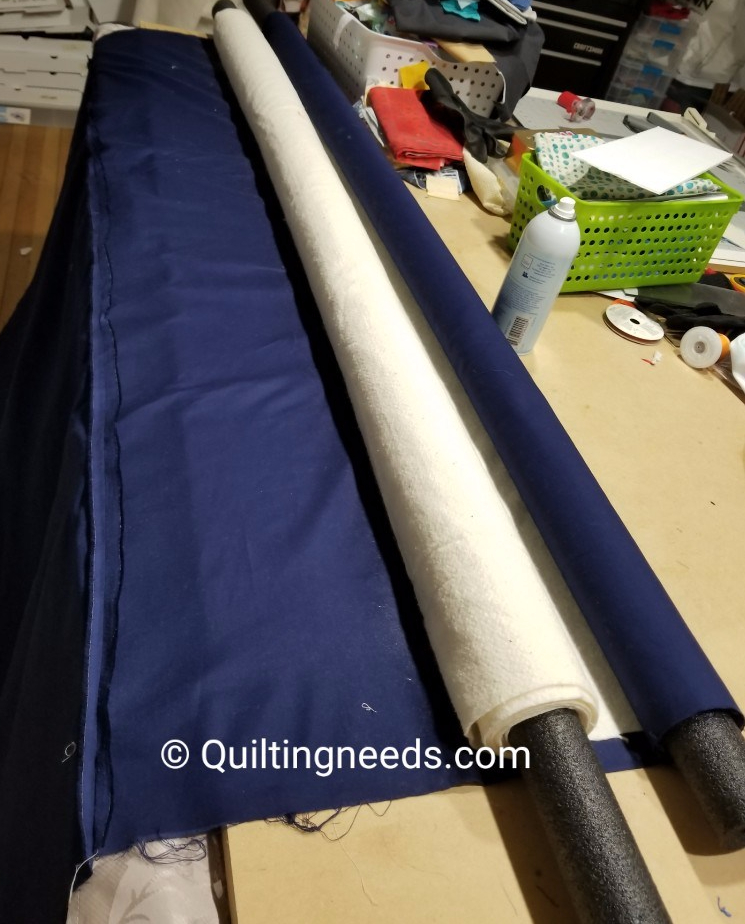
of inches clear across the top to get it started.  Lay the batting on the backing and smooth out.  Continue to apply baste spray a few inches at a time.  Roll the completed backing and batting onto the pipe insulation until you have it all spray basted.  As you roll the basted backing and batting on to the insulation tube, you can ensure there are no wrinkles.  If you find some, unroll and re-smooth.

6.)  Next we are ready to baste the top to the batting and backing.  Take your roll with the backing and batting and unroll a bit.  Line up the roll that contains your top.  Spray a few inches across the batting watermark_2019-01-15-20-47-09and position your top.  Continue to spray baste and roll onto the pipe insulation as you go.  Make sure to smooth as you go.  Keep spraying and rolling until you have it complete.

7.) You should now have your quilt basted and rolled up nice and neat on the pipe insulation.  It will stay all nice and neat until you are ready to quilt.

You could prepare multiple quilts and store them on the pipe insulation for very little watermark_2019-01-16-15-41-14
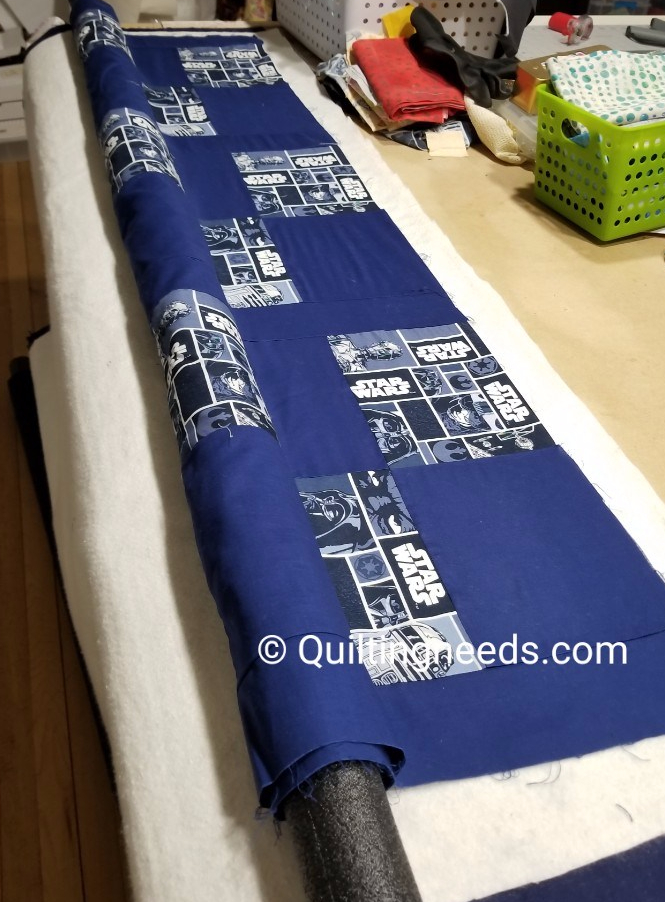
money.  They will stay rolled up an unwrinkled until you are ready to quilt them.

I hope that someone finds this beneficial.  It was very helpful to keep things nice neet and flat until I was ready to quilt.  It also stopped me from having to “clean up my area”(pool table) in order to spray baste.  I only needed the width of my quilt and about a foot of the length in order to complete the spray baste.

Happy Sewing

Happy Quilting

Treasure your Family


Look what $11.99 gets you…..

So, I have been looking for a travel sewing machine.  I hate taking my expensive Bernina machines when I go to sew ins etc…

Can you believe that I bought this for $11.99 at Goodwill.   Works perfectly.  Looks like it was not used much.  Needs a bit of oil, but I cold not be happier.  This weekend Lynn and I are going to a Sew in sponsored by our guild.  Yeah!

Nothing fancy, but perfect for a traveling machine.

I think things may be looking up.

Happy Sewing

Happy Quilting.

Blogging Slacker here but I got my One Monthly Goal completed! Woohoo!

I feel like it has been forever since I have done a blog post.  Way too much going on.  My daughter has had some crazy virus.  SHe is getting better, but we are still doing breathing treatments three times a day.   Kevin has also been sick.  Amazingly, the person with the compromised immune system (me) has managed to stay healthy.

I managed to completed my One Monthly Goal amidst the insanity.  I really love this quilt.  I have names it Hugs and Kisses.  I quilted circles on this quilt (hugs).  They don’t look to bad.  I used freezer paper.  basically, I used a protractor (showing my age) to draw circles on freezer paper and then sewed on the lines.  The freezer paper was good but I did learn a few things.  First being, don’t iron all the pattens on at once.  Just iron on a few at a time.  I initially ironed them all on and manipulating them under the machine caused them to loosen.  I eventually, pulled them off and only put them on one row at a time.  Then I had no more issues.  I will use the freezer paper method again.  I ended up using a sulky thread that was sort of an Ombre orange.  It went from dark orange to light orange.

I got to make this quilted wall hanging for free.  My local quilt shop Red Rooster Quilts gives a free quilt block every two weeks.  I am already collecting my next set, which is a lovely christmas wall hanging.

I really like this wall hanging and plan on hanging it in my family room.  I think it is because I really like orange fabric.

Happy Sewing

Happy Quilting