Practice the quilting with Hard Candy

So, I do not like my actual quilting, ever.  So, I decided that I would work on practicing this while at the same time, hoping to create a few gifts.  Well, while I believe that I will keep this one for myself (quilting is hideous), I did manage to learn a few things.  Slow down……  That is a big issue for me.  I totally need to slow down.

Until you get much better, use thread that is not so noticeable.  Duh.  The thread I used on this, was so pretty on the spool, orange/yellow/brown.  However, it is so noticeable on the piece that every little mistake (and there are tons) shows up, and I see every one of them.

20160726_214909.jpg

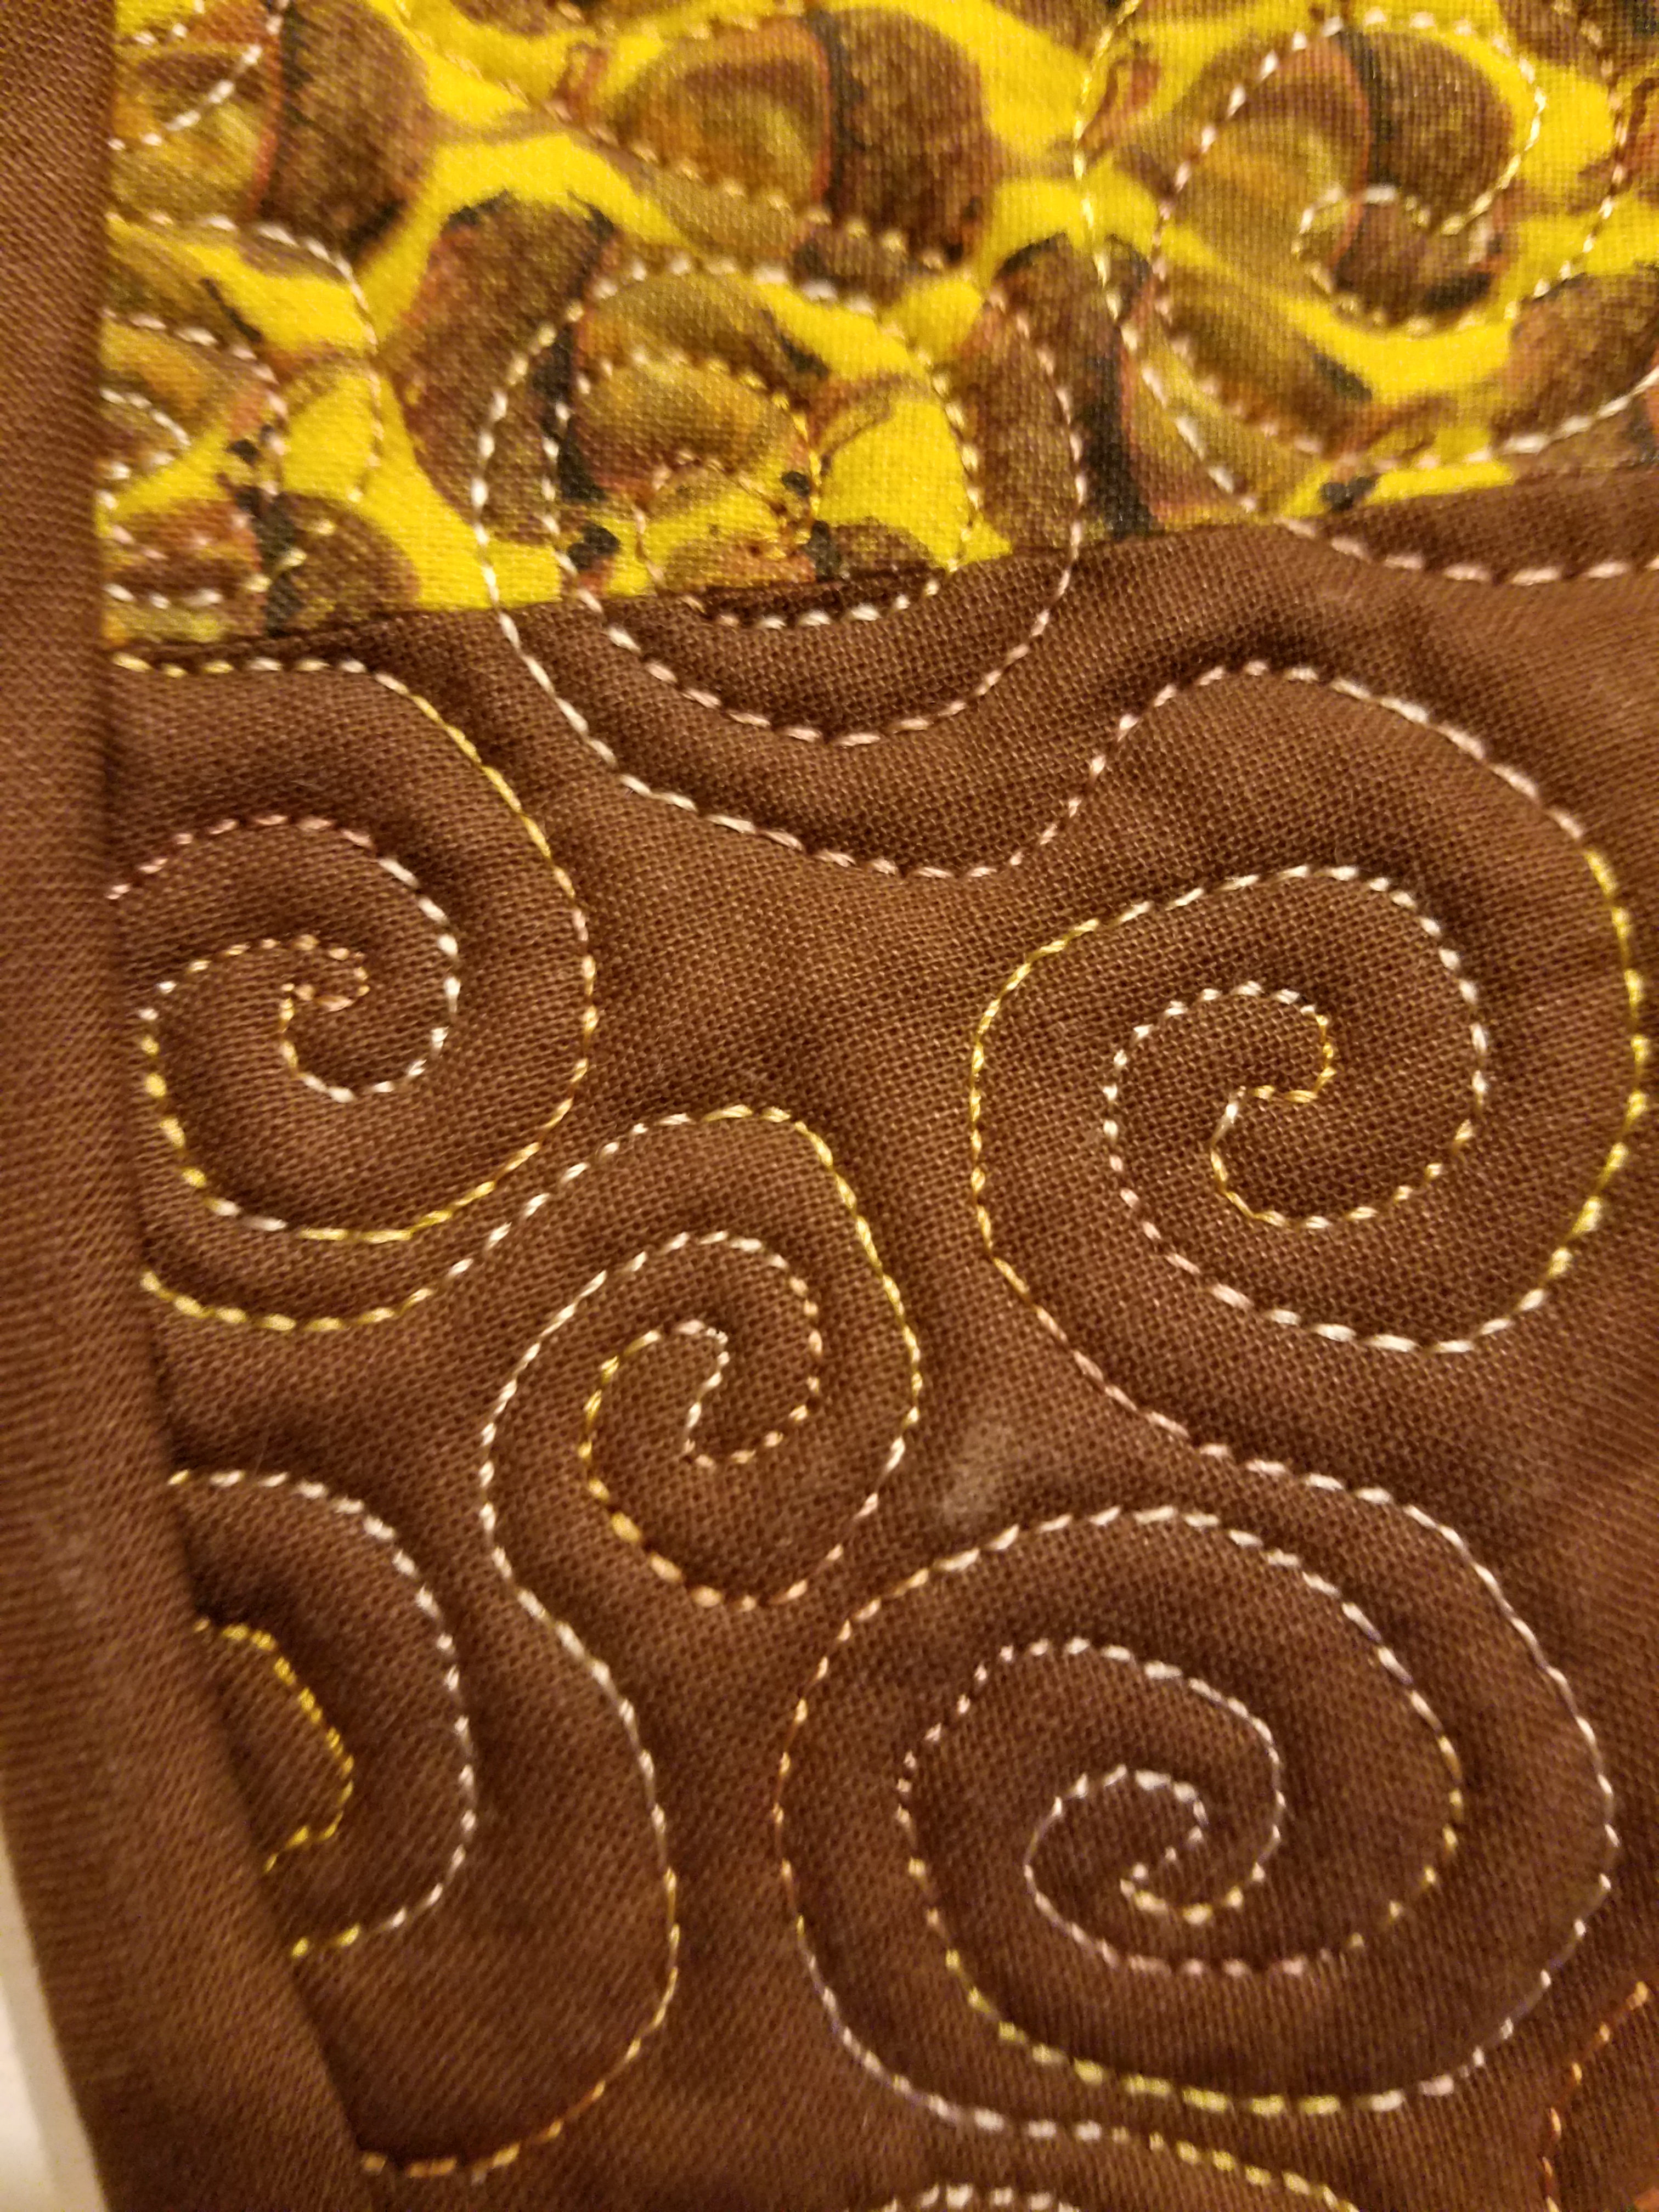
I actually like the back of this quilt better than the front.  Probably because the awful quilting is less noticeable.  I also liked the fat quarter that I used.  Never knew what exactly what to do with it, but this sort of worked.  You can tell that it was not quite big enough, but it still looks ok.

20160726_214917

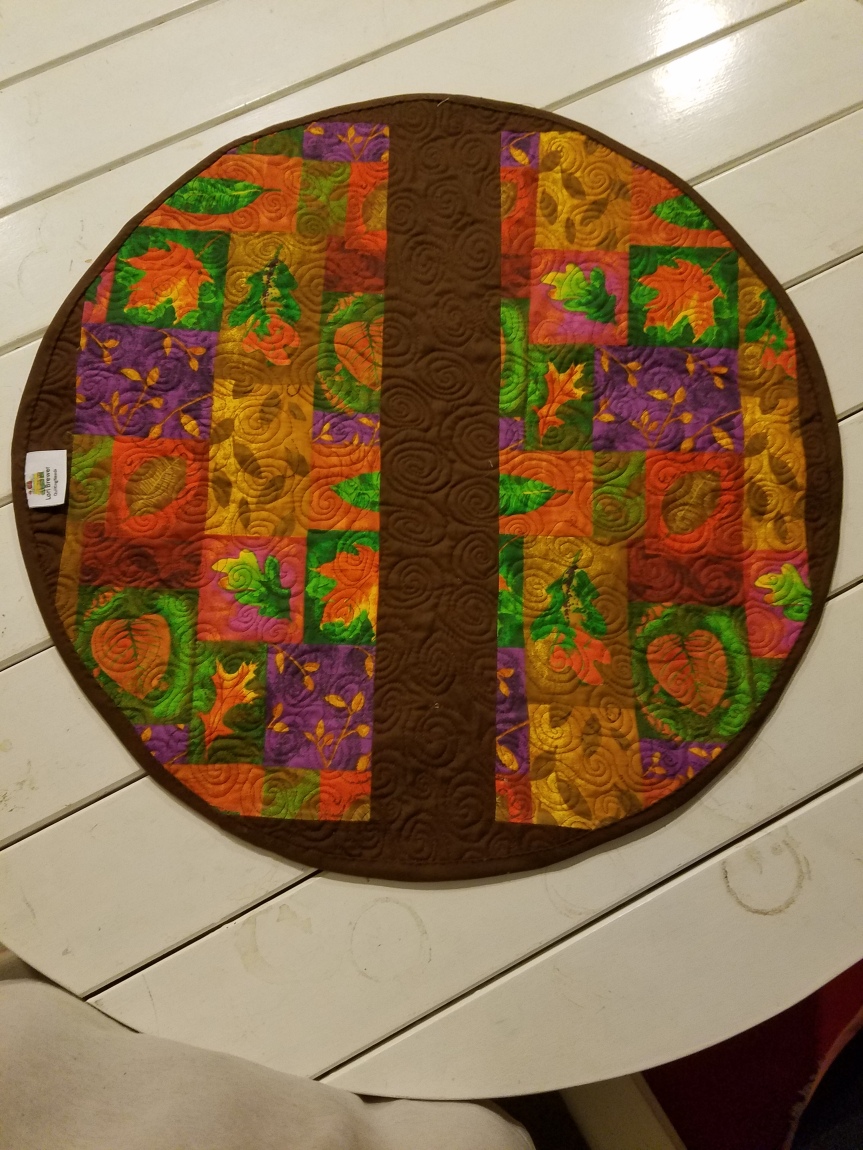
So, my geometry skills also suck.  Weird thing about that is that I am a math/science person all the way.  The only math I did not like was Geometry, which is totally weird because I love quilting and it is geometry.  I did not have enough acorn Fabric to make enough pieces at the full length.  So, I figured that I would just shorten them a bit and make a smaller topper.  Well, that would have made total sense if you shortened the correct end.  Duh, again.  I shortened the small end, which just made the hole in the middle bigger.  So, besides practicing my quilting, I need to brush up on my Geometry and maybe give back that MBA to the university.


More Rock Candy practice to come.


Happy Sewing


Happy Quilting

My Very First Quilt Ever

So, when I was looking for my red/white/blue quilts in the cedar chest, I came across my very first quilt (which I had sort of forgotten about).  It brought back some fond memories.

I think I started making this quilt when I was about 14.  I had no idea how to do it and the Internet didn’t really exist.  So, I just winged it.

Here’s the story:  When I was a kid, my next door neighbors had these jackets.  On the jackets they had patches of all the places that they had visited.  I thought this was awesome and started to collect them myself.  I had a windbreaker full of patches.  Once day I realized that my windbreaker didn’t fit very well anymore and would likely wind up at good will.  So, I carefully took off all the patched.  For some reason I decided to make a quilt because I figured it was something that I would keep for a while.   I guess I was right.

On this quilt are all the places I visited as a kid and some as I got a bit older.  It brought back some very fond memories of family vacations and things I just did as a kid.  I remember when my daughter was born that I sort of wanted to do the same thing for her, but people don’t make many patches these days.  They are a bit hard to come by.

The actual techniques are pretty awful.  I am not sure what I did when it came to binding.  But, it holds so many memories that I will never part with it.


Happy Sewing

Happy Quilting

Happy July 4th – Celebrate with a quilt

This was the second quilt I ever made.  I actually hand quilted it.  It took forever, but it was great therapy at a difficult time of my life.

I hope everyone had a safe and enjoyable holiday weekend.

Happy 4th

Happy Sewing

Happy Quilting.

Quilting, Quilting, Quilting

So, I struggle with the process of quilting. This quilt is no exception. I attempted to freehand hearts. When I look at the quilting, I can see how it improved somewhat about half way through, but it is still no where near where I would like t to be. I do like the colors in the quilt and I will give it a young lady for her sixteenth birthday. I need to get another one ready to practice on……

Happy Sewing
Happy Quilting

Yes, one of my dogs photo bombed my picture.

The Crafty Widow Brings You: Personal Tags for Everything You Sew

Do you want your own personal tags for the items you sew, just like at the store? If you don’t have a ton of money to spend on them, but still want them I can show you an easy and inexpensive way to have nice professional looking tags that can be sewn into whatever you make.

My tags are made on White ribbon with Fabric Transfer sheets. I like the grossgrain ribbon, but you can use the satin wedding type also.

1.) Purchase ribbon in the width that you would like your tags to be. Easy.

2.) Setup your labels on your computer/printer. There is some testing that goes on here to make sure that your labels will fit on your ribbon. On Duplicate it as many times as possible so you can get as many as possible from each transfer sheet. You will need to reverse the image before it is printed, so when it is ironed it is not backwards.

3.) Once your design is set, duplicated, and reversed, print on the transfer paper. Make sure to follow the directions for the transfer paper you use.

4.) Once printed, you can cut them apart and iron them on to a length of ribbon. Make sure to use a lot of pressure when ironing.

I sew my tags in nearly everything that I make. It gives it a very professional look. It reminds whomever has your handmade item who made it.

Be creative, use your imagination. You can create care labels, labels with your logo and or web address. Whatever you can fit, you can have.

Happy Creating/Happy Sewing